An OMR sheet has two jobs. The obvious one is collecting answers. The one that goes wrong is collecting whose answers they are — and a stack of beautifully marked sheets that cannot be matched to students is forty minutes of scanning thrown away.
This is about the top third of the sheet: what gets printed there, what the app actually reads, and the one setting worth thinking about before you press print.
Two halves of the header
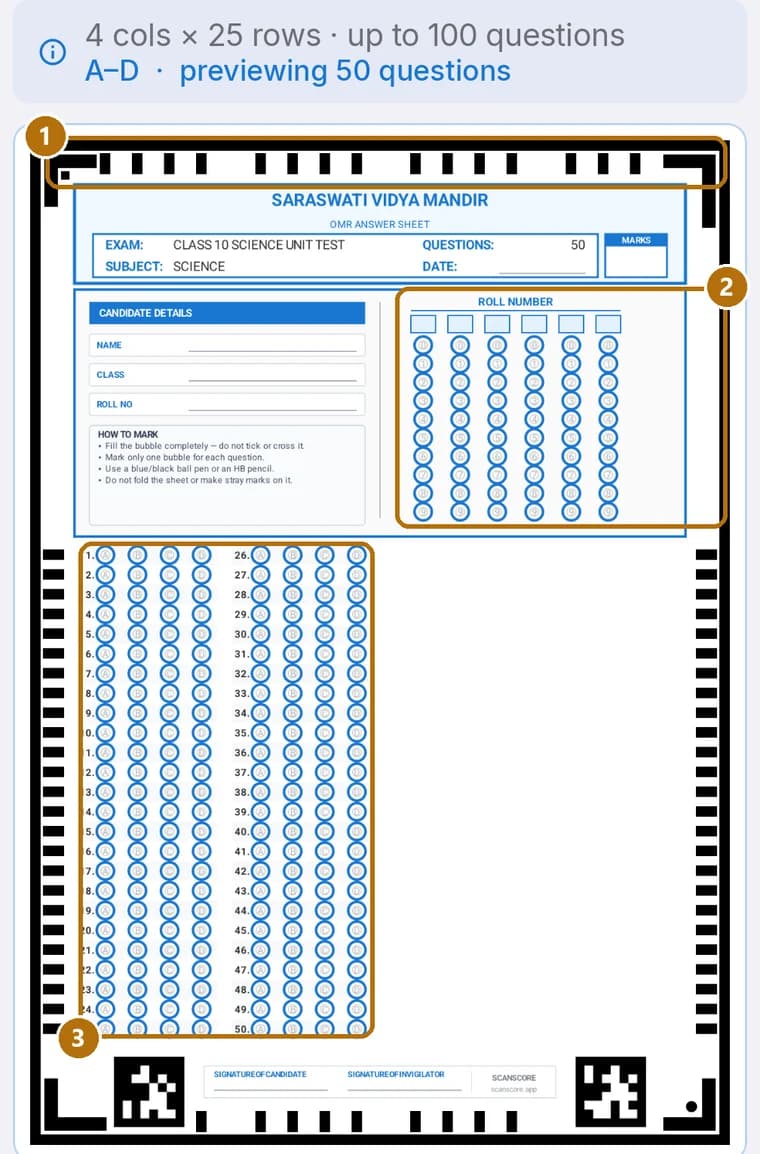
Three things are happening up there:
- The frame and corner marks 1 — the black border, the four corner blocks, the edge ticks and the two coded tags at the bottom. These are not decoration. They are how the app finds the paper in a photograph, straightens it, and works out where every bubble should be. Nothing you write goes here.
- The roll number bubble grid 2 — one column of ten bubbles per digit. This is the part the app reads.
- The candidate details block — ruled lines for name, class and roll number. Written by hand, read by you, ignored by the scanner.
The answer grid itself 3 fills the lower two thirds, and how many questions fit there is covered in the sheet format guide.
Choosing the printed rows
On the second step of creating an exam, open Candidate Details on Sheet. Student name and the written roll number are marked always and cannot be turned off. Everything else is yours.
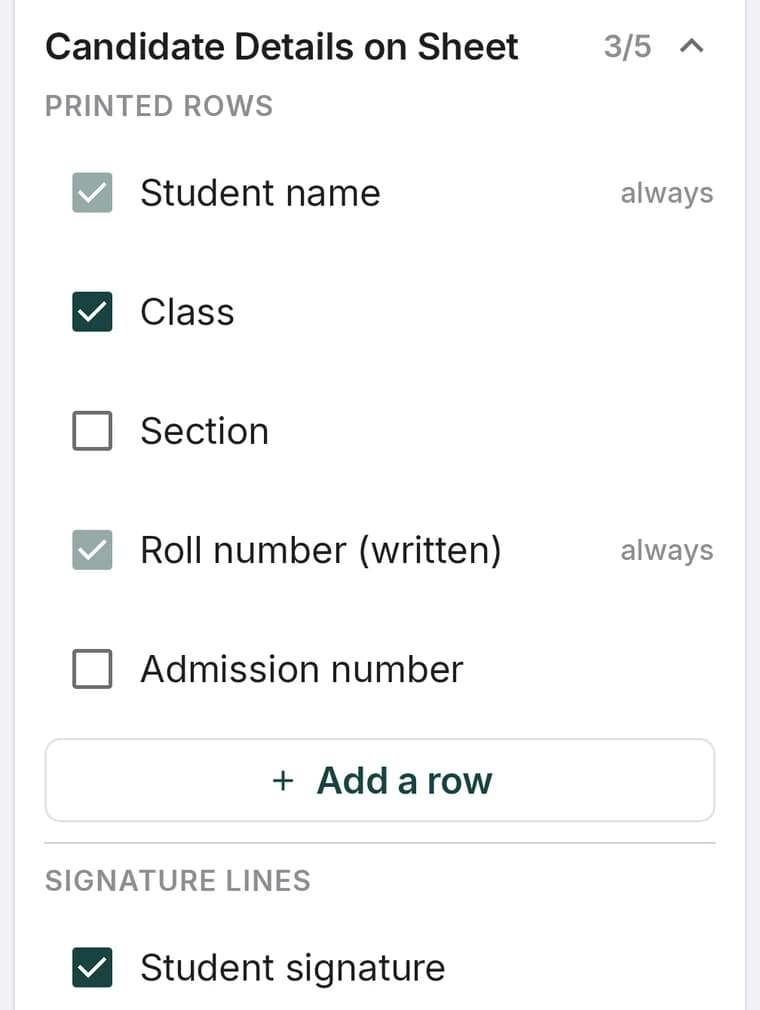
- Class and Section — worth printing if one exam is sat by more than one section, because it is how you sort the pile afterwards.
- Admission number — for schools whose official records key on it rather than a class roll.
- Add a row — your own label. Batch, centre code, shift, parent's phone number. Useful for coaching centres running the same test across branches.
- Signature lines for the candidate and the invigilator, which some boards and most formal mock exams want.
Every row you add takes space from the answer grid, so on a 200-question sheet the compact header is doing real work. Switch on what you will actually use.
How many roll number digits
Roll Number Length sits just below, defaulting to six. Each digit is a printed column of ten bubbles, so this is the setting that decides how much of the header the grid eats — and how many chances a student has to make a mistake.
| Your roll numbers | Set length to | Why |
|---|---|---|
| 1 to 60, one class | 2 | Two columns, nothing wasted, almost impossible to fill wrongly. |
| 1 to 400, a whole school | 3 | Still compact, and covers every student in the building. |
| Admission numbers like 2026104 | 6 or 7 | Match the official number so marks drop straight into school records. |
Whatever they fill, nothing is lost if it goes wrong: the roll number can be corrected on the result screen after the scan, as described in the scan review guide.
Your school's name on top
On the last step there is a Heading field. Type your school, college or coaching centre name and it prints across the top of every sheet for that exam. Leave it empty and the sheet simply prints without one.
It costs nothing and it matters more than it sounds. A sheet with the institution's name on it reads as an official document, and students treat it like one.
Three sheet designs
The same content prints in three layouts, and the preview updates live as you switch between them:
- Standard — clean, blue-ruled, with the “how to mark” instruction box. The default, and the right answer for everyday class tests.
- Standard + Photo — adds a box for a passport photo, for board-style exams and entrance tests where identity is checked at the desk.
- Premium Edition — a more formal design with boxed fields and a heavier header, for finals and public mocks.
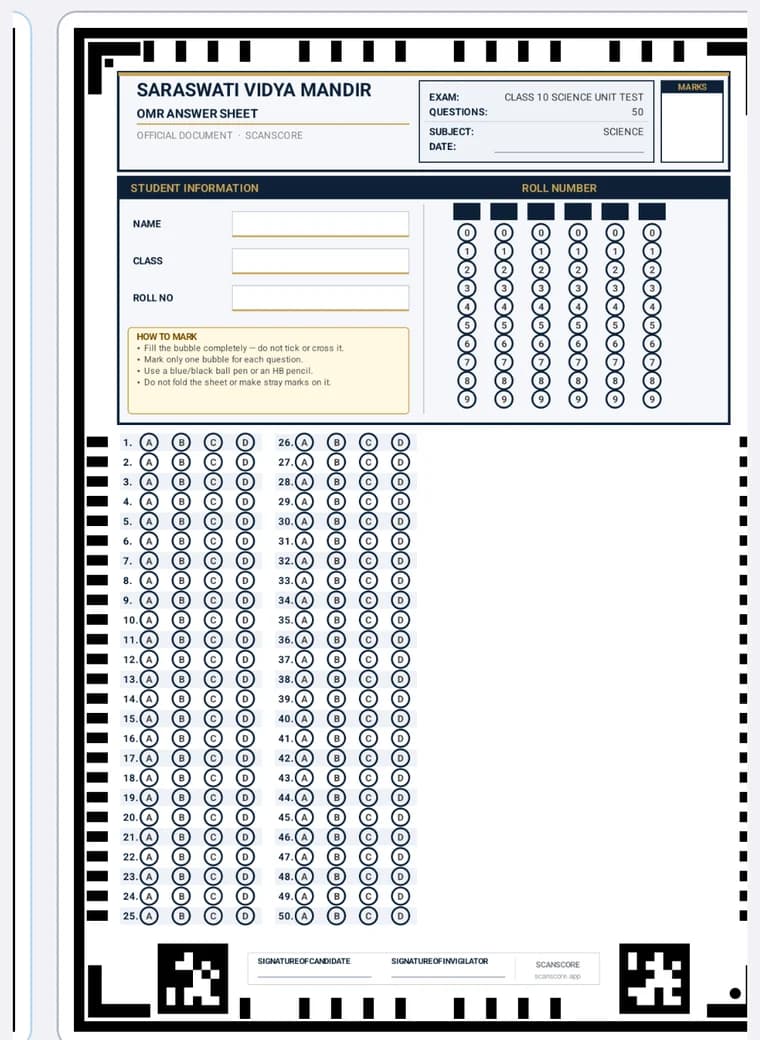
There is also a theme colour — eight options — which only changes the printed rules and labels. The bubbles, the frame and the corner marks stay black whatever you choose, because that is what the camera needs. If you are printing in black and white, pick the dark theme and the sheet looks deliberate rather than washed out.
Mistakes that cost you a rescan
Scaling the PDF when printing
Print at 100%, actual size, on A4. “Fit to page” shrinks the sheet and moves the corner marks in, which is the commonest cause of a sheet that will not read.
Photocopying a photocopy
Each generation thickens the frame and fades the bubbles. Print from the PDF every time — it costs nothing and it is the same file.
Ticks and crosses instead of filled bubbles
The instruction box on the sheet says to darken the bubble completely. A tick is a thin line and reads as an empty bubble more often than not.
Changing roll number length after printing
The grid changes with it, so sheets printed under the old setting no longer match the exam. Decide the length first, print once.
Get the header right and the rest looks after itself: the app reads the roll number, matches it to your class roster, and the marks land against a name without you typing anything. How that matching works is in the class management guide.